A glass shelf is more than just a storage solution; it's a design statement. It offers a sense of openness, light, and modern elegance. However, the beauty and functionality of a glass shelf are entirely dependent on one critical element: the hardware. Choosing professional-grade fittings is not just about aesthetics—it's paramount for safety, stability, and longevity. This comprehensive guide will walk you through everything you need to know to select and install the perfect hardware for a secure, professional-looking result.
Why Professional Hardware Matters: Beyond the Basics
Investing in high-quality fittings is the difference between a wobbly, hazardous shelf and a secure, permanent fixture. Professional hardware offers distinct advantages:
- Superior Materials: Typically crafted from solid brass, stainless steel, or high-grade zinc alloys, professional fittings resist corrosion (essential for bathrooms), bending, and wear over time.
- Precise Engineering: They are designed with tighter tolerances, ensuring a snug and secure grip on the glass. This includes soft gaskets or nylon-tipped screws to protect the glass from chipping or cracking under pressure.
- Verified Weight Capacity: Reputable manufacturers provide tested and verified weight ratings. This is non-negotiable for ensuring the shelf can safely support its intended items, from delicate collectibles to heavy bathroom products.
- Lasting Finish: Professional-grade finishes like polished chrome, brushed nickel, or matte black are applied using superior techniques (e.g., PVD coating) that resist scratches, tarnishing, and fading.
Decoding the Hardware: A Deep Dive into Glass Shelf Fittings
The type of fitting you choose will define the shelf's look and load-bearing capability. Here are the most common professional options:
Shelf Brackets (Clamps)
These are the most popular and versatile choice. They grip the glass from below, or both below and above, without requiring any holes in the glass itself.
- Pelican-Style Brackets:
- Description: A sleek, jaw-like design that clamps onto the glass. An adjustable screw underneath secures the grip.
- Best For: Medium to heavy loads, floating shelf aesthetics, and shelves from 6" to 12" deep.
- Pro-Tip: Always use a pair and ensure they are rated for your specific glass thickness and total weight.
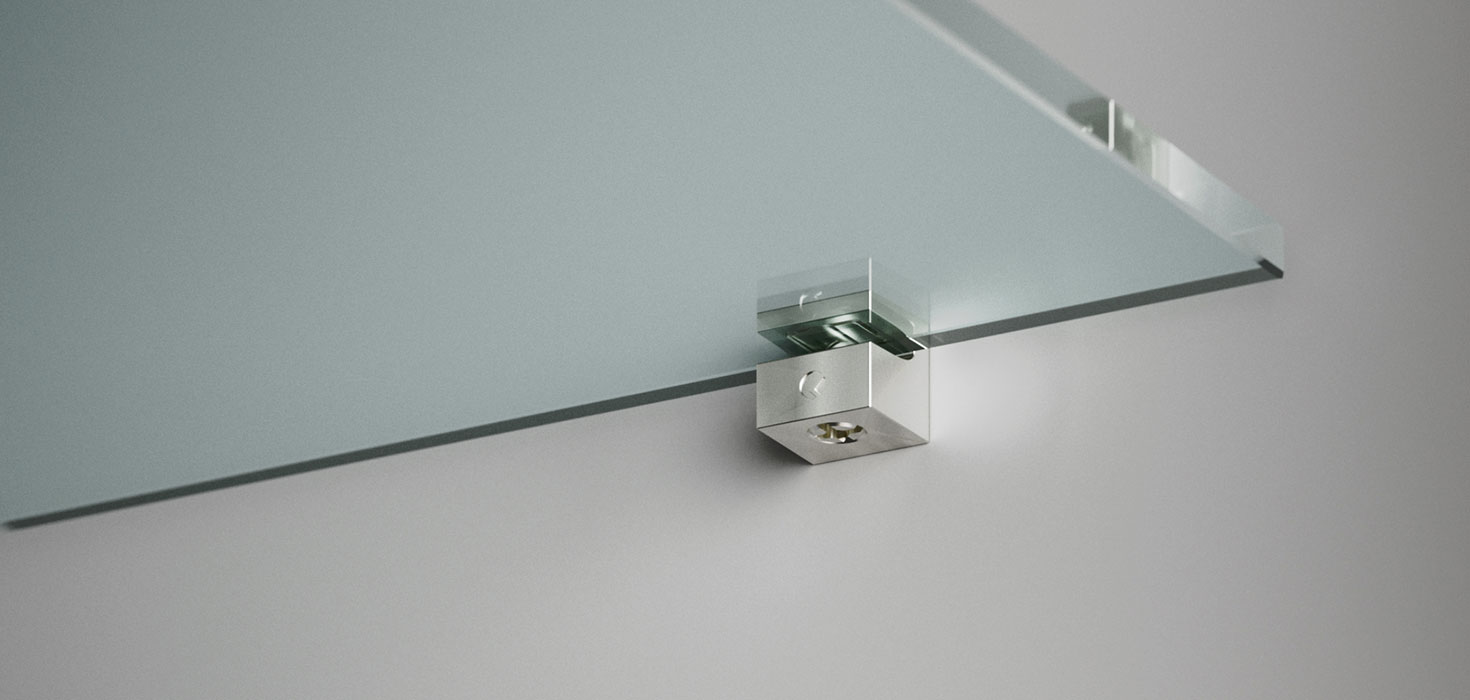
- Square or Cube-Style Brackets:
- Description: Minimalist, small-footprint clamps that support the glass from the bottom, secured with a nylon-tipped screw.
- Best For: Light to medium loads, minimalist designs, and displaying smaller items. Ideal for bathroom vanities and display nooks.
- Pro-Tip: For longer shelves, consider using three or more brackets for even support.
Shelf Clips & Supports
These are smaller, more discreet options often used for lighter applications or corner shelves.
- Corner Shelf Clips:
- Description: Specifically designed to support triangular or quarter-circle glass shelves in a 90-degree corner.
- Best For: Shower corners, small display areas. They provide excellent stability by using two walls.
- Pro-Tip: Ensure you purchase a set that matches the radius or angle of your corner glass.
Channel Systems (U-Channels)
For a fully supported, built-in look, channels are the ultimate professional choice.
- Description: A continuous metal channel is mounted to the wall, and the glass slides into it. It provides support along the entire edge of the glass.
- Best For: Heavy-duty applications like bar shelving, retail displays, or long bathroom shelves. Creates a clean, "floating" appearance from the front.
- Pro-Tip: A silicone bead inside the channel can provide a cushion and secure the glass, preventing rattling. Channels are typically fixed to one, two (corner), or three (alcove) walls.
The Holy Trinity of Secure Installation: Glass, Weight, and Wall
A secure installation depends on three interconnected factors. Getting one wrong compromises the entire system.
1. Glass Specifications
- Type: Tempered Glass is the only safe option. If it breaks, it shatters into small, relatively harmless pebbles rather than dangerous shards. Never use annealed (standard) glass for shelving.
- Thickness: Common thicknesses are 1/4" (6mm), 3/8" (10mm), and 1/2" (12mm). The thicker the glass, the stronger and more rigid it is. Your hardware must be compatible with your chosen thickness.
2. Weight Calculation
- Hardware Capacity: Check the manufacturer's maximum weight rating for a pair of brackets.
- Shelf Weight: Don't forget to subtract the weight of the glass itself from the total capacity.
- Load Distribution: Distribute weight evenly across the shelf. Avoid concentrating heavy items in the center, far from the brackets.
3. Wall Structure & Fasteners
- Studs: The gold standard. Whenever possible, mount your hardware directly into wall studs using wood screws. Use a stud finder to locate them.
- Drywall (No Studs): You must use appropriate hollow-wall anchors. For glass shelves, heavy-duty toggle bolts or snap-toggles are superior to simple plastic anchors. They provide a much larger clamping area behind the drywall.
- Tile & Masonry: This requires a special drill bit (carbide-tipped for tile, masonry bit for concrete/brick) and appropriate masonry anchors or screws. Drill slowly and carefully to avoid cracking the tile.
Aesthetics & Finish: Marrying Style with Strength
The hardware's finish should complement your room's existing fixtures (faucets, lighting, door handles).
- Polished Chrome: A classic, highly reflective finish that works well in modern and traditional bathrooms.
- Brushed Nickel/Stainless Steel: A softer, matte finish that hides fingerprints and water spots. Excellent for contemporary and industrial styles.
- Matte Black: A bold, modern choice that creates a strong contrast and is currently very popular in modern farmhouse and minimalist designs.
- Brass/Gold Tones: Adds a touch of warmth and luxury, perfect for art-deco or high-end traditional spaces.
Step-by-Step Professional Installation Guide
- Gather Your Tools: Tape measure, level (a 24" level is ideal), pencil, stud finder, drill, appropriate drill bits, and fasteners for your wall type.
- Plan & Measure: Decide on the shelf height. Use the tape measure and level to mark a perfectly straight line on the wall where the bottom of the shelf will sit.
- Locate Mounting Points: Use your level line as a guide. Hold a bracket at one end and mark the screw hole(s). If mounting into studs, use the stud finder to locate them and mark them.
- Mark the Second Bracket: Measure the distance between the desired bracket locations on your glass shelf (e.g., 2-4 inches in from each end). Transfer this measurement to the wall along your level line to mark the position for the second bracket.
- Drill Pilot Holes: For studs, drill a pilot hole slightly smaller than your screw diameter. For drywall anchors or masonry, drill a hole sized for your specific anchor.
- Install Anchors & Brackets: Insert wall anchors if needed. Secure the first bracket to the wall, but don't tighten it completely. Attach the second bracket, ensuring it is level with the first, and tighten it. Now, go back and fully tighten the first bracket.
- Set the Glass: Carefully slide or place the glass shelf into the brackets. Use the adjusting screws on the brackets to clamp it securely. It should be snug, but do not over-tighten, as this can stress the glass.
- Final Check: Place the level on the glass shelf to confirm it is perfectly level both front-to-back and side-to-side. Gently press on the shelf to ensure there is no wobble.
Frequently Asked Questions (FAQ)
How far apart should glass shelf brackets be?
As a rule of thumb, place brackets approximately 1/4 of the shelf's length in from each end. For a 36" shelf, this would mean placing them about 9" from each side, leaving 18" between them. Never exceed the manufacturer's recommended span.
Do I need to drill holes in the glass for these fittings?
No, the primary advantage of the professional brackets and channels discussed here is that they clamp onto the edge of the glass, requiring no fabrication or holes. This preserves the integrity of the tempered glass.
Can I use these fittings in a shower?
Yes, but you must choose a hardware material that is highly corrosion-resistant. Solid brass or 304-grade stainless steel are the best choices for wet environments. Ensure the wall is properly waterproofed before drilling.
What is the maximum depth for a glass shelf?
For clamp-style brackets, shelf depth is usually limited to around 12 inches. Deeper shelves create too much leverage and can overload the fittings and fasteners. For deeper applications, consider a different support system or additional brackets.